Vehicle Sandbox
A downloadable project for Windows
In some ways, Halo is the story of the Warthog and the universe we built to drive it around in. - Jaime Griesemer
I think about the Warthog from Halo almost every day. I've tried to recreate it four times before. This is the fifth time. This time however, I didn't want to try and emulate it so literally and instead make something that gets across a lot of the feelings you get from it while still being practical to develop for into a full game.
This project was partially inspired by Madrigal Games' Traction Point, a currently in development "Warthog game", which I am very excited about and uses a completely custom engine and toolchain.
Features
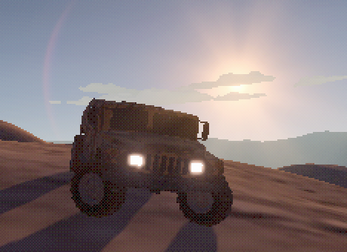
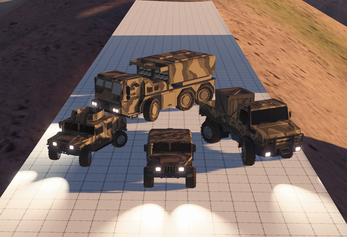
- Four driveable vehicles
- Scout: Fast little off-road car.
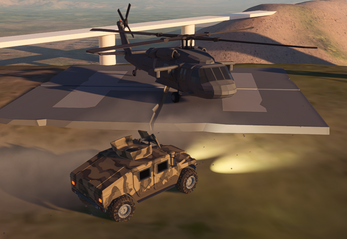
- Armed Scout: Variant of the above but with a (non-functional) turret and four wheel steering.
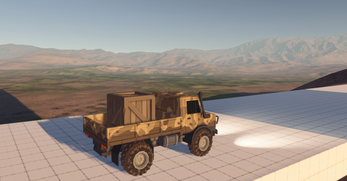
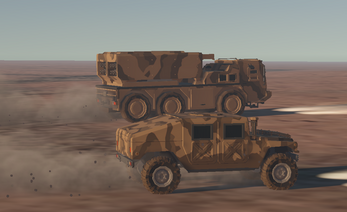
- Utility Truck: Torquey medium cargo truck that can easily tow vehicles its size and smaller.
- Rocket Truck: Huge 6 wheeled truck.
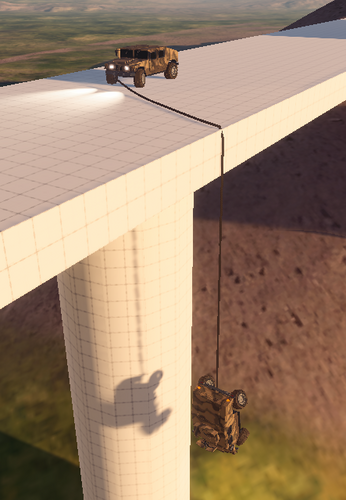
- Connect two vehicles together with a rope to tow one of them around.
- Hook ropes physically react to the environment, and will snap if too much force is put on them.
- Two different control modes
- Look: Vehicle will drive in the direction the camera is looking. Very similar to FPS style controls.
- Direct: Drive the vehicle directly using manual steering and a gas and reverse axes.
- Two different camera modes
- Look: Control the camera independently of the vehicle. Meant to be used with the Look controls, but can also work with Direct controls.
- Chase: Intuitive chase camera, with the view controls now functioning relative to the car. Can only be used with Direct controls.
- Typical graphics settings, plus a fun dithering and render scale setting
- Basic vehicle AI which when the Call button is pressed, an Armed Scout will try its best to drive to your position
Controls
| Command | Gamepad (Xbox) | Mouse/Keyboard |
|---|---|---|
| Drive (Look mode) | Left Stick | WASD |
| Forward/Reverse (Direct mode) | Right/Left Trigger | W/S |
| Turning (Direct mode) | Left Stick | A/D |
| Rotate Camera | Right Stick | Mouse |
| Reset Vehicle (Must be stopped) | X | Left Mouse Button |
| Attach/Detach Hook | A | Spacebar |
| Switch Vehicle | Y | E |
| Call "Buddy" | B | C |
| Settings Menu | Start | Escape |
Physics

Believe it or not, it's Unity WheelColliders. My first couple Warthogs used the very difficult to work with and finicky and always feel like they're broken Unity WheelColliders, and here I am back to using them again.
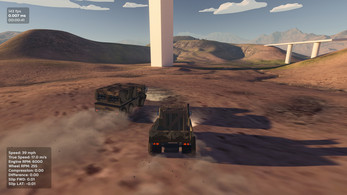
To get it working, there's a lot I came to understand about using them. One of the biggest helps was to print out the wheel RPM and slip to the screen so that I could see exactly what they were doing. Since the physics for the wheels are based on reality, it's very easy to tell the wheels to do crazy things with code that just wouldn't happen in reality because of the real life physics of whatever is driving, or attached to, that wheel.
Also worth mentioning, is that I noticed that a slight forward bias to the center of mass made the vehicles more well behaved when going over a jump, and less likely to nosedive into the ground.
Friction
Unity's wheels are designed to work around realistic grip curves with extremum and asymptote simulating the points where a wheel has grip, and then the point where it breaks loose. Halo CE though, as far as I can tell, uses a much simpler and linear friction model. You can break the friction model and make it act more linear by using the really goofy settings below. Especially for an off-road setting, this kind of slippery and very predictable grip curve feels very good. The stiffness value then gets used for modifying the grip as needed, e.g. driving on concrete/road versus dirt.

Suspension
The suspension another part of working with Unity WheelColliders that is very easy to mess up. Below are the rules I typically start with when working with suspension. Doing just these things, goes a long way in removing many of the problems people experience with Unity wheels:
- Spring: Should be one order of magnitude greater than the vehicle's mass. You need a spring that's strong enough to support the vehicle's weight, but not so strong that it launches the vehicle into the stratosphere.
- Damper: Take the spring value, divide it by 20. This is where I always start, because it gives the springs a nice satisfying bounce and I think that looks good in video games. Oftentimes higher is necessary though, it all depends.
There is one other trick that's used in this project for suspension (though only on the two Scout cars) and it's a dynamic spring and damper rate. Essentially, the more the wheel suspension is compressed (or extended) the higher the spring and damper rates get. The "DynamicShockPower" for the Scout cars ended up being 10, with the spring/damper values set to roughly a third of what they would normally be to compensate.

The effect of this is that for small bumps, you get a nice satisfying soft bounce, but you don't sacrifice the necessary suspension and damper strength required for the cars to navigate large jumps easily without always bottoming out. A sort of best of both worlds of soft and hard suspension.
Forward Traction and Wheelspin

While I have had previous experience with the sideways friction and suspension in particular. What I've never satisfactorily gotten working before was wheels propelling themselves. They always felt broken, and I think I've come to understand a lot about why that is after this project.
Similar to the springs and dampers, a big part of the reason these things can feel so bad is that you can apply torques to the wheels in a way which is completely unrealistic. As with any kind of physics system, if you feed it unrealistic values, you will at best get unrealistic results. At worse, the entire system freaks out and breaks.
Getting the propulsive forces of the wheels working was the most difficult aspect of the vehicle physics. One of the biggest takeaways was that the WheelCollider mass matters a lot! This value has always perplexed, me but I think I get it now:
- It has nothing to do with physics weight of the wheel. I.e. making a wheel 5000 kg does not add 5000 kg to your vehicle. This is something I've been unclear about for years, so I would often set it to some low value because I was afraid it was messing with the weights. It is worth noting though that this does affect the "downforce" of the tire, but that really only manifests in the form of adding grip to the wheel.
- It's better to think about it as the rotational inertia the wheel. This made a lot of sense once I started applying motive and braking torques to the wheel. Just like how mass interacts with forces that push things around, the heavier the mass of the wheel, the longer it takes for a force to get it spinning, or to get it to stop spinning. Tweaking this value is also a good (if unrealistic) way to dampen the wheel accelerations/decelerations. All the wheels in this project weigh 500+ kg since I didn't want to write a complex power train simulator.
These two facts, combined with printing out, and keeping track of the wheel rotation rates, made a lot about how the wheel friction works. In fact, on the HUD, the speed you see measured is actually based on the front left wheel's rotation rate, and not the true velocity the vehicle has moving through the world. When the wheels are spinning, you can see how the speed jumps way up, or way down, compared to what the values should be.

To control torque, I used a very simple torque curve which drops off as the wheel's rotation speed approached a predefined and arbitrary maximum speed. It was important to base this on the wheel's speed, not the vehicle's true speed, because wheelspin can cause unintended overshoots of the vehicle's maximum speed. This was based loosely on Toyful Games' excellent video on arcade physics based vehicles.
Using this information made it so much easier to dial in the torque and grip values to get what I was looking for. For the Scout cars in particular, I actually wanted them to spin a bit, because it's fun and looks cool with the little rocks thrown around. The heavier vehicles however, have been tuned so that they control their traction better.
Hooks/Ropes

This wasn't something I was planning on doing, but turned out to be a fun (and also frustrating) weekend. They're a chain of Rigidbodies connected to each other using a HingeJoint with a break force (that last part is very important). The endpoints meanwhile, connect to the trucks in pre-defined spots using a FixedJoint.

Getting these joints to behave was a nightmare. The documentation talks about how joints between objects that are of very different masses causes unstable behavior and oh boy does it. Using the obvious values of something like each rope link having a mass of like 1 or something caused a lot of issues with the rope freaking out and tossing both vehicles into the air while it turned into a squiggly black hole.
The tricks to getting it to work were threefold:
- The rope links themselves needed to be as massive as possible without disrupting the behavior of the rope itself. For each rope point, I settled on a mass of 1, which isn't that heavy, but it gets adjusted using...
- MassScale is the first magic keyword that made this work. Used on the FixedJoint endpoints of the rope, MassScale (connectedMassScale to be precise) adjusts the relative mass of the rope appear to be much heavier than it actually is to the vehicles. For whatever reason, this makes the rope much more stable and less prone to freakout. Tweaking this took trial and error. Too high a value and rope will weigh so much that it bogs the vehicles down. Too low, and the physics break.
- Breakforce was used to cover up the remaining freakouts. Even with the mass scale hacks, you could still tug on the rope hard enough to GMod both vehicles into the sky. With Breakforce, you basically just let the rope break, and then detach it from the vehicles, before it can do anything really bad.
I'm really happy with how the ropes turned out after all the tweaking and hacks. The "just let the rope break instead" was the final piece of the puzzle that really made it all work. Not only does it solve a horrible physics glitch, but it has the great side effect of giving towing a bit more depth, since you want to be careful not to tug so hard on the ropes that they snap!
Look Controls vs Direct Controls

By default, the vehicles in the game are driven by what I'm calling Look Controls. Since this is loosely based on Halo's Warthog, it only seemed natural, especially since this control scheme is a big part of why the Warthog feels the way it does. It encourages a very fun and drifty driving style, while keeping it completely under the control of the player since they are simply communicating intent rather than having to steer themselves. It's also just, very visually interesting and that's worth a lot to me!
This plan did not survive contact with the enemy.
100% of the three family members subjected to this, by shoving a Steam Deck in their face, did not fare well. Two of them figured it out, but still had difficulty. One was just completely helpless. Everybody expected the left stick to steer and was very confused that it didn't. Nobody really understood what the right stick was doing without being told.
Thinking about it, one of the reasons the look steering is so brilliant in Halo, is because the game is primarily a first person shooter. It provides a totally seamless transition between running around on foot, and driving, since both sticks are essentially still doing the same thing. Left stick to move. Right stick to aim. Without that context, the look controls are a bit strange. People who aren't familiar with Halo (of which none of them were), would have no idea what this is referencing, or understand why they should use the right stick to look at anything in the first place.

So, I added the Direct Controls, which is essentially the typical control scheme that uses the left stick for steering, and the triggers for gas/brake (though in here it's more like forward/reverse). I don't think most people would get along with controlling both the car and camera, so I also added a Chase Camera to the game. It's very unremarkable, just a typical chase camera that follows the vehicle.
| Look Camera | Chase Camera | |
| Look Controls | ✅ | ❌ |
| Direct Controls | ✅ | ✅ |
You can mess with the three combinations of control scheme and camera by switching to the Camera tab in the settings menu. Look is still the default though because that's what I designed this all in mind with.
AI and Navigation

I don't have too much to say about this other than it's actually very difficult to get the AI to drive nicely and smartly. Getting them going in a particular direction is very easy, since it's essentially the same code as the Look controls for driving. Where it gets really hairy though is if they need navigate anything with any precision. Since the vehicles are so slippery, and with a lot of momentum to their movements, it's not easy to tune them with a simple PID for something that works in all cases.
For example, one thing they struggled with a lot was the above corner. Climbing up it is no big deal at full speed, but going down, they'd just fly right off the cliff since they didn't know to either pre-steer so that they perfectly drift around the corner, or to slow down enough that it's just a non-issue. My current hack for this is that if the AI sees a lot of navigation turn points coming up, that probably means it's a tight turn, so they slow down. All the more complex solutions I came up didn't work as well.
It's a very difficult problem to solve, and this isn't just me. The difficulties I had in getting the AI to behave nicely reminded me of all the times I've seen Marines in Halo get themselves stuck or flip over. I only spent a couple days on this, but I'm not sure right now what I would do to improve this beyond making sure to design levels around their limitations.
Dithering

This is an ongoing subplot, not really related to the vehicles themselves, but still included in this project.
For a long time I've been trying to figure out how to write a universal dithering shader such that it would cut down on the colors and then dither blend the results. I know examples of this exist out there, often under some flavor of retro or PSX shader pack, but I wanted to write it myself!
Well, between some searching online and some help from a few very smart people who know this stuff well, I was finally able to figure it out! I love the way it looks, and while not really appropriate for the visual style of this project, it's definitely something I'm filing away in my toolbox. The shader code can be found here.
Two things to note about this!
- The posterization/quantization of the colors must be done in gamma space. If done in linear space, the shadows get too dark, and lights get totally blown out. This was the secret sauce provided by Krishty that really made this look incredible.
- When anti-aliasing is used, only MSAA and SMAA look good with the dithering. FXAA and TAA meanwhile mess with the colors, with TAA in particular causing some very bad banding. I couldn't explain to you why this is, and I'm also unclear on why SMAA seems to work fine.
This dithering was added to the settings menu at the last minute. Play around with it, and rendering scale, to get a really cool look!
Steam Deck
Like every other weekend side-project I've had since I got the Steam Deck, a lot of effort has gone into making this as playable as possible on the Steam Deck. I love this thing, and honestly I think if I ever make another full game after Tiny Combat it'll probably be be built with the Steam Deck in mind. Having a fixed hardware target and control setup to develop towards is incredibly comfy. It's all the good parts of developing for consoles.
Without just actually releasing this as a game on Steam, there isn't really a convenient way to release this for Steam Deck. I made an "official" control profile, which has some cool trackpad setup for using the recording features. You'll also just have to take my word for it that it runs at 90 FPS on the Steam Deck and controls very well. All the UI is necessarily controllable with the gamepad, something which UI Toolkit makes a lot easier than the old UGUI system.
Changelog
1.0 (November 30 2024)
- Initial release
Download
Install instructions
- Extract the folder "VehicleSandbox" using a program like 7Zip.
- Inside the extracted VehicleSandbox folder, double click the "VehicleSandbox.exe"
Comments
Log in with itch.io to leave a comment.
It feels so realistic! This would be OP if it was a real game! Are there any plans for that?
No I couldn't figure out what to do to make it into a game. I learned a lot though.
how to go in helicopter?
It's not flyable. It's just scenery.
oh, but can you make beamng drive pls realistic for windows 11 if you want?
What?
Neat, very, very cool
I agree. It would be neat and very, very cool if this was developed into a full game.
YES YES YES YES FUCK YES YES FUCK FUCK FUCK YES YES HOLY SHIT YES
best game developer has uploaded a new game!!!!
Yep, a Mac or a Linux version would have been even better!!!!